Tasks for mechanics 1-1
Content: task1-1.doc (109.00 KB)
Uploaded: 01.09.2017
Positive responses: 0
Negative responses: 0
Sold: 4
Refunds: 0
$2
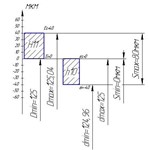
The build quality of the car is ensured by the connection of the parts with the required fit. To solve the problem The source data Car ZIL-431410 The Assembly (unit) – engine: ZIL-508.10 Item No. 1 – the block (top hole under the sleeve) Item No. 2 cylinder (outer diameter) The connection of the parts has a size of ф125Н7/h7 To determine a) accepted system of the connection b) fit the basic deviations and qualitity hole and shaft; C) upper and lower deviation of hole and shaft; g) limiting dimensions of hole and shaft; d) tolerances on the manufacture of hole and shaft; (first count through their limits, and then check through their rejection); e) the maximum and minimum gaps of the connection; g) tolerance (to first calculate using the maximum and minimum gaps, and then check out using the tolerances of hole and shaft). Make a graphical image of tolerance zones of the compound in scale of 1000 : 1, which show their deviation limit
The solution of the problem is followed by an explanation and a breakdown of the formulas. After payment you will be able to get a file made in word. Perhaps the solution of this problem according to your requirements.
No feedback yet
